
ProctorNX-Candidate Guide for Proctored Examination
Secure. Intelligent. Trusted. Everything you need for exam day, in order.
Before you opt in — you need two devices
Primary Device: Laptop / Desktop — Windows, macOS · Secondary Device: Mobile phone — iOS or Android
Get your space and devices ready
Confirm all three areas below before your exam slot starts.
Connectivity
- At least 1 Mbps on both primary and secondary devices
- Stable connection for the full exam duration
- Keep the laptop connected to power
Screen & devices
- Screen sharing is mandatory from the laptop
- Working camera and microphone on both devices
- Close unnecessary applications before starting
Room & seating
- Quiet, well-lit room with minimal disturbance
- Desk and chair, ideally with a plain backdrop
- No additional people, screens or devices nearby
Laptop + mobile — two devices, one secure exam
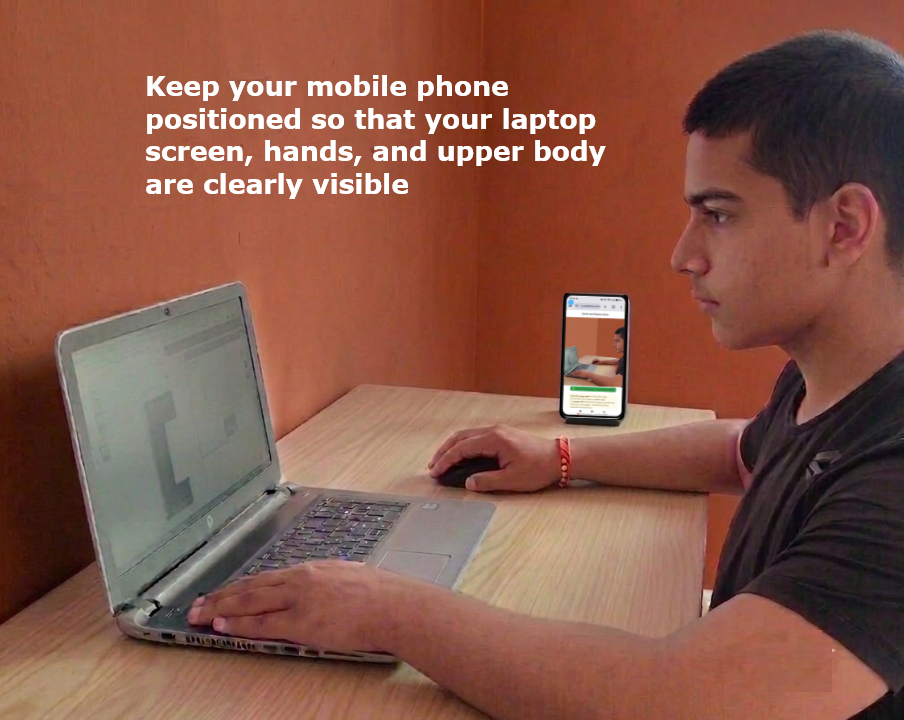
Your laptop runs the exam itself; your phone acts as an auxiliary camera watching the room.
-
💻 Primary device — Laptop
- Use your laptop or desktop as the main exam device
- Confirm the camera and microphone are working
- Check your internet connection
- Close unnecessary applications before starting
-
📱 Auxiliary mobile — Camera
- Keep a mobile phone ready as the auxiliary camera
- Scan the QR code shown in Safe Exam Browser
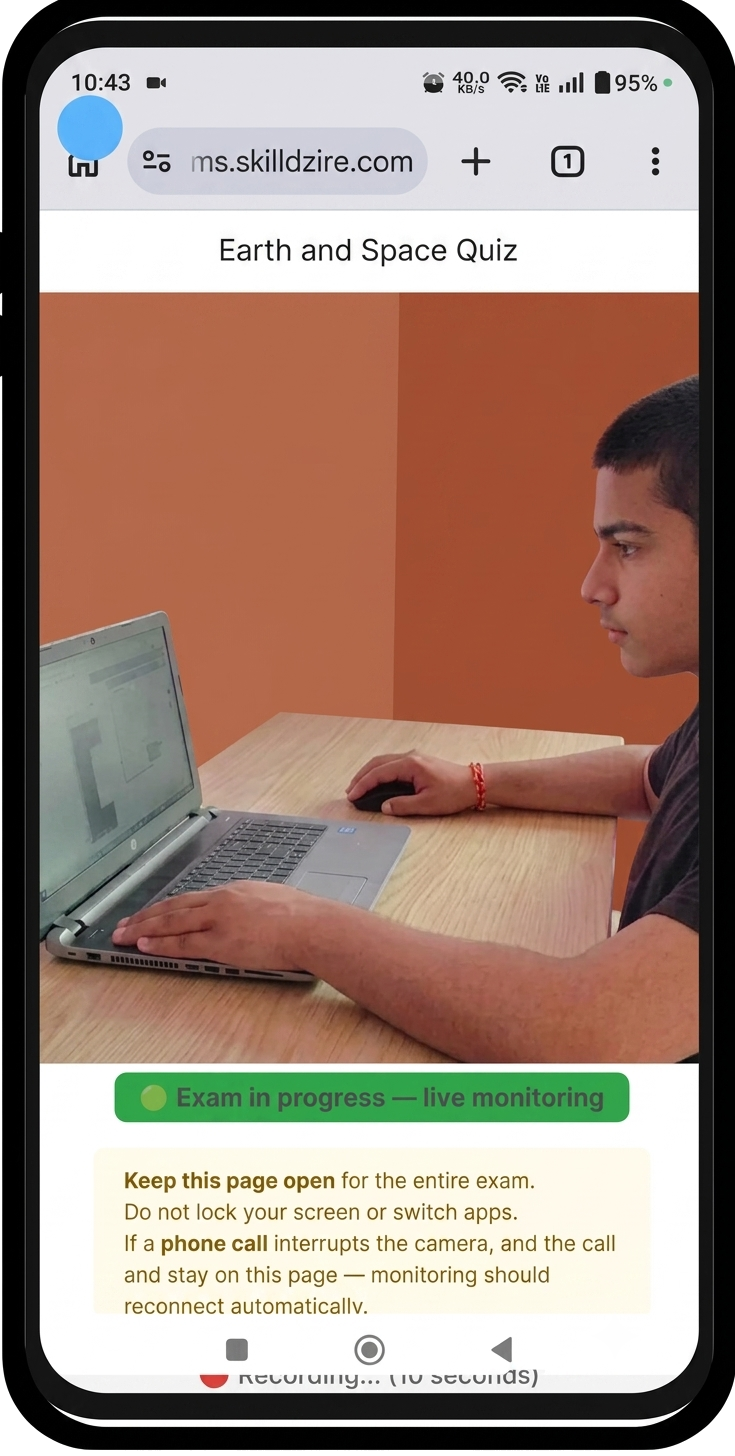
- Keep the auxiliary-camera page open throughout the exam
Log in to your account
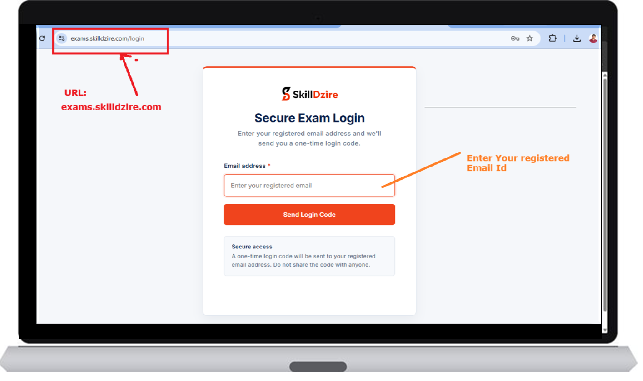
You'll receive a exam login link. Sign in with a one-time code sent to your email.
- Open the exams login link and enter registered email, then click Send Login Code
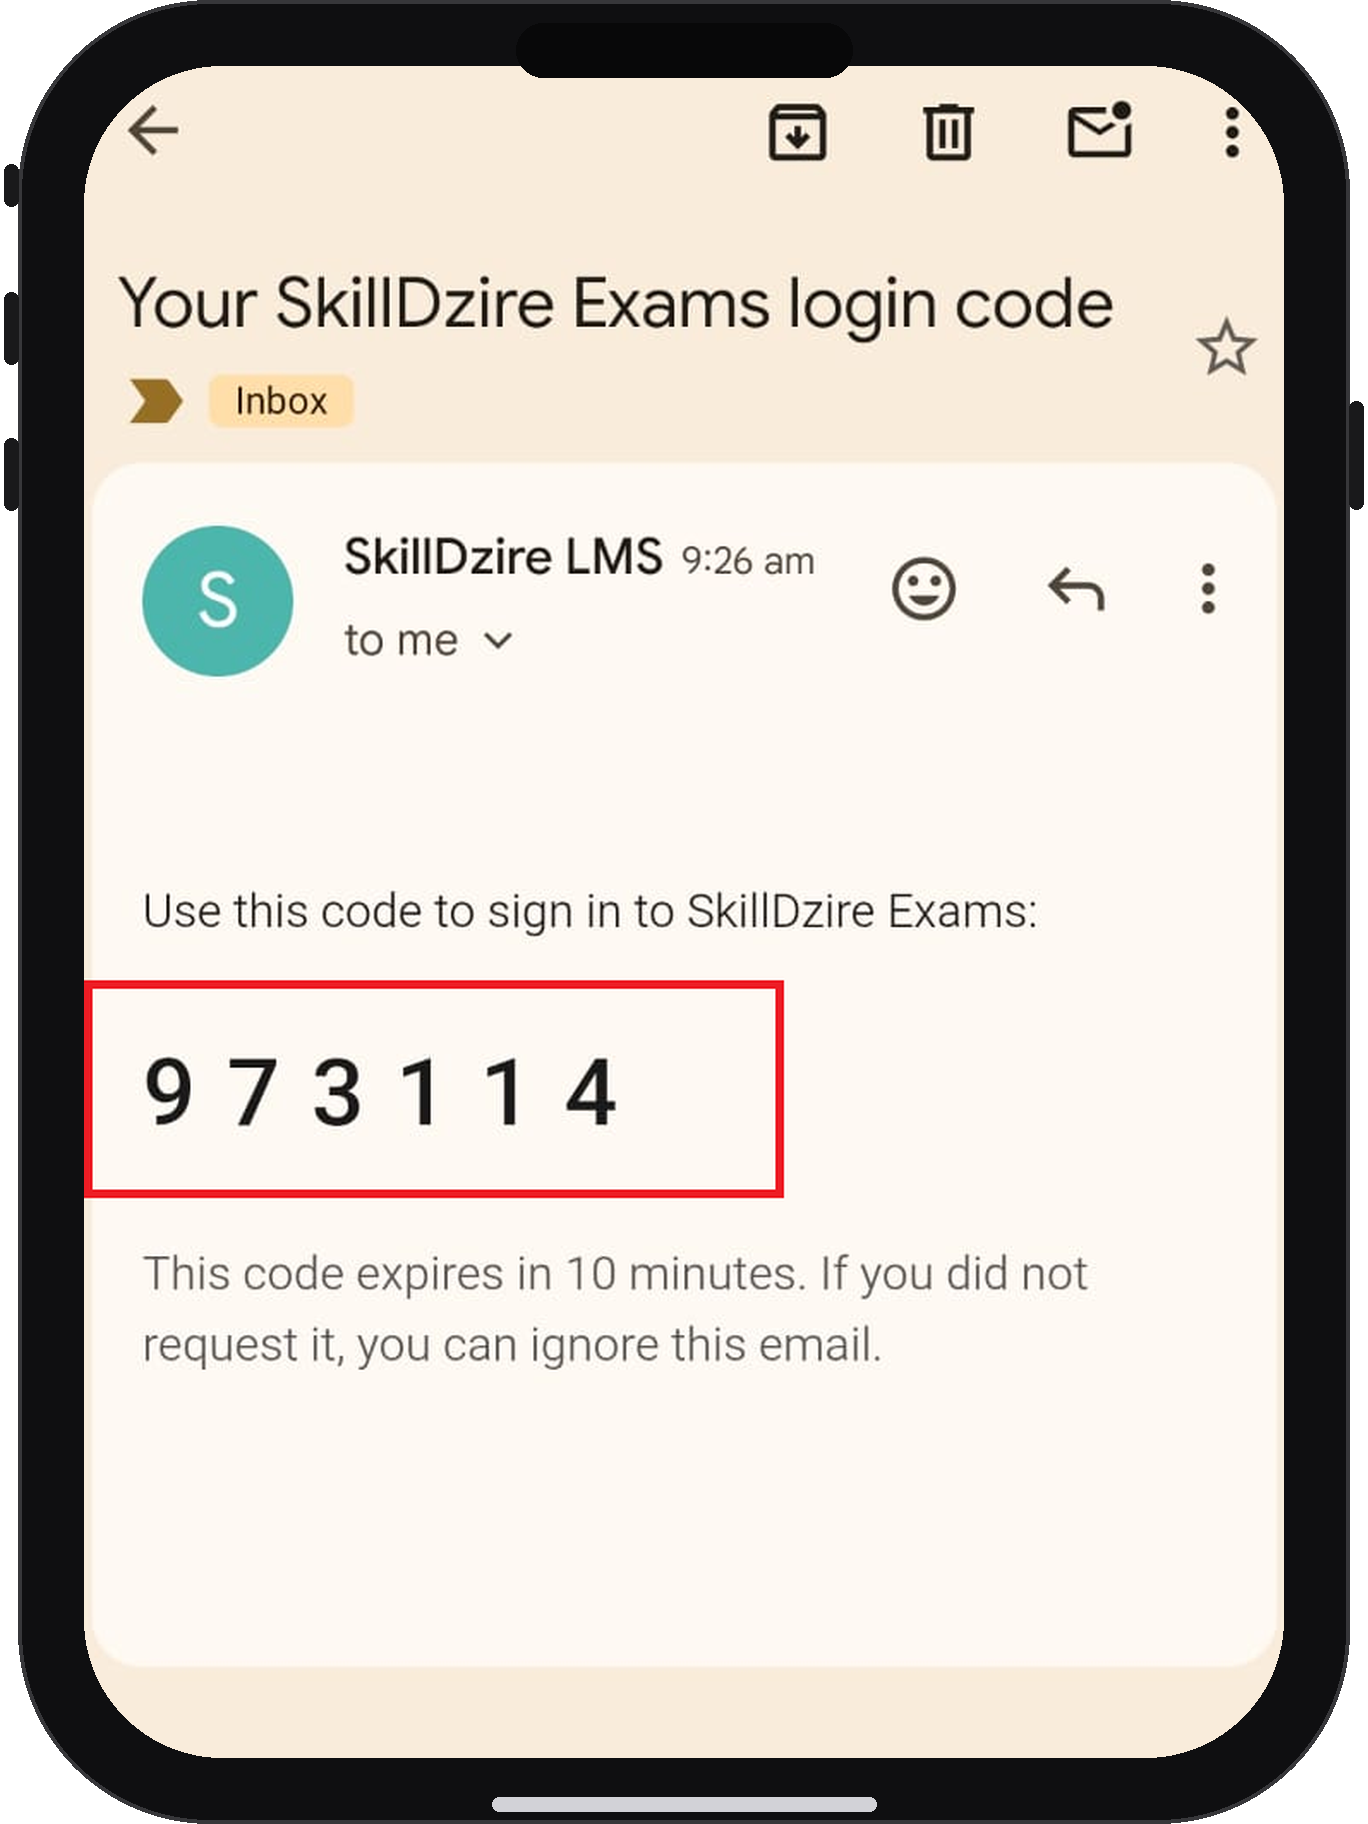
- Open the SkillDzire Exams login-code email in your inbox and copy the 6-digit code
- Enter the code on the verification page and click Verify and Sign In

Confirm Safe Exam Browser is required
Before the exam opens, SkillDzire shows a "Before you begin" page confirming the exam must be taken inside Safe Exam Browser (SEB).
If you have not installed SEB, download it and follow the installation steps. If SEB is already installed, simply click Proceed to continue.

Download & install Safe Exam Browser
SEB is a secure browser that restricts other websites and applications while you're testing. Download the version for your operating system.
- Windows requirement: Windows 10 or Windows 11
- Download, then install Safe Exam Browser
- Return to SkillDzire once installation finishes

Launch SEB & close other applications
After pre-launch checks, click Launch Test and confirm you want to open Safe Exam Browser.
- Save any important work before continuing
- Review the applications SEB lists for closure, then click Yes to let it terminate them


Connect & position your auxiliary mobile
Scan the QR code on your laptop screen with your phone to link it as the second camera.
- Scan the QR code shown in SEB, then follow the on-screen prompts on your phone, including granting camera access
- Keep the auxiliary-camera page open and connected throughout — reconnect via the on-screen instruction if it drops
- Position it roughly 2–3 ft (0.7–1.0 m) away so both you and your laptop screen are visible — prop it up with a cup or similar object if needed


Start recording
Allow microphone and camera access when prompted so monitoring can begin.

Record your exam environment
Using your phone's rear camera, record a 15-second video of your surroundings.
- Clearly show the exam room, study table, and laptop or workstation
- Include the nearby surroundings, then upload the clip when prompted


Share your entire screen
Click Share Screen and choose Entire Screen — this is the recommended and typically required option.
- Click Share to confirm
- Sharing only a browser tab or window isn't permitted unless you're told otherwise


Enable full-screen mode & start
Click the Full Screen button — the portal enforces full-screen for the entire exam. Once checks pass, sharing is active, and full-screen is on, click Start Exam.


Take, submit & exit
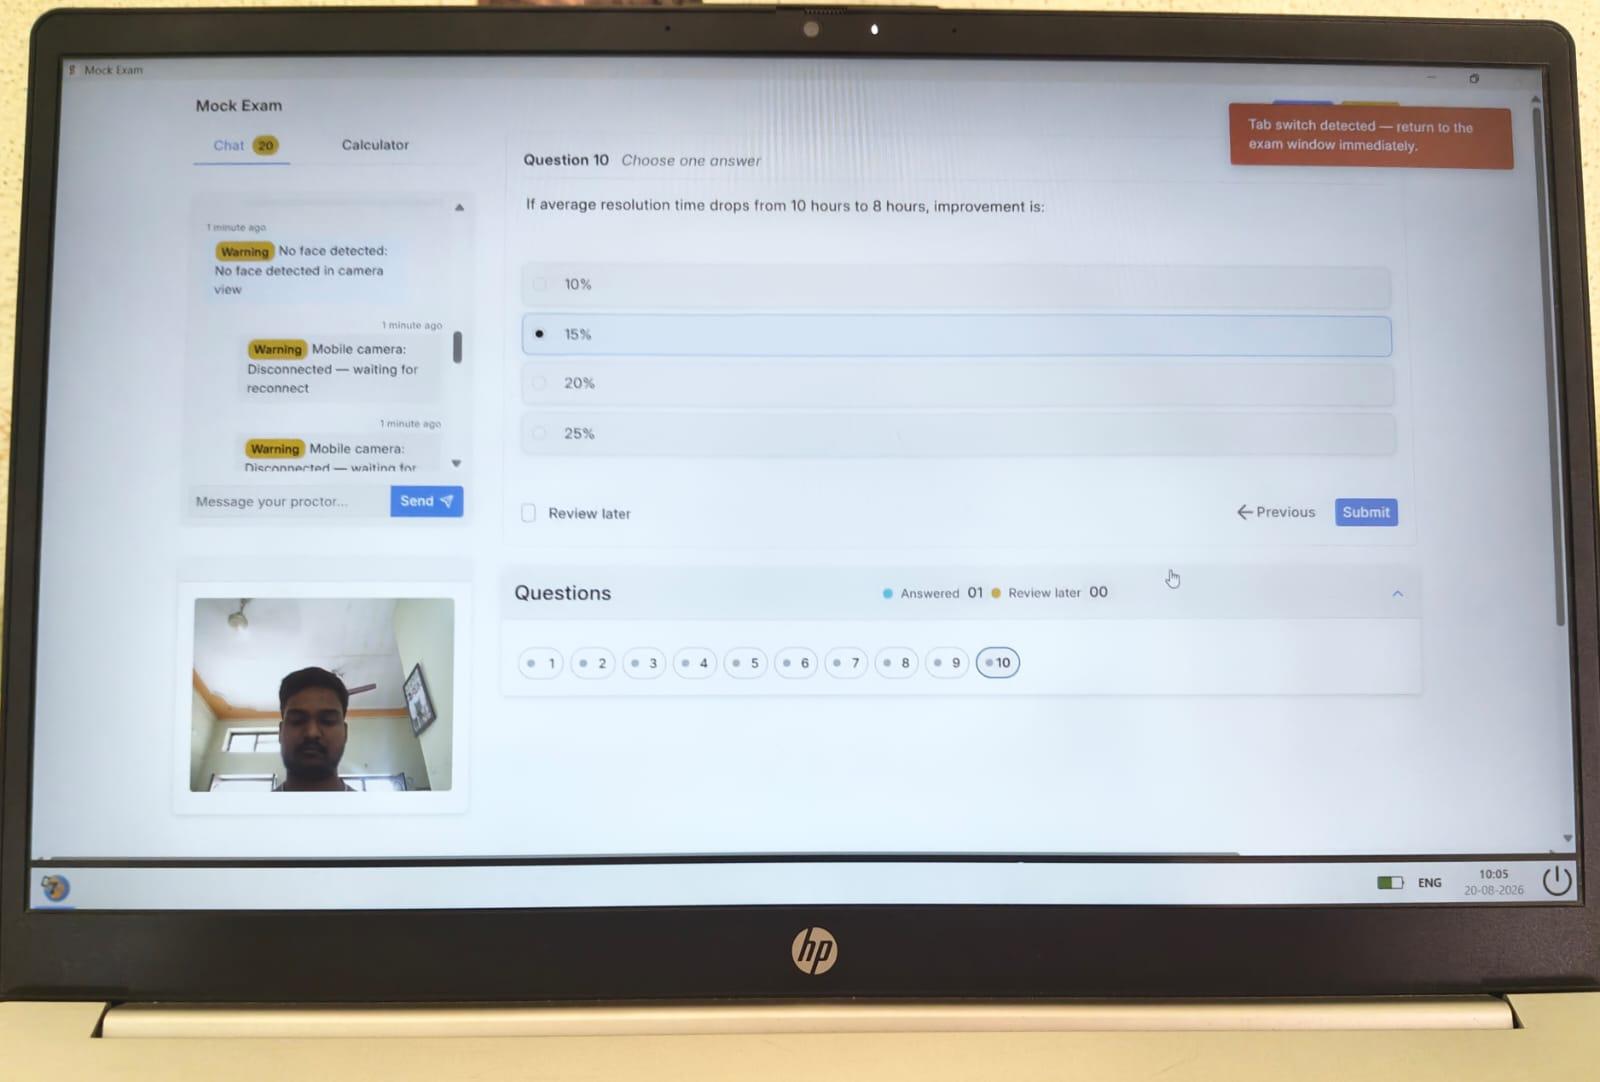
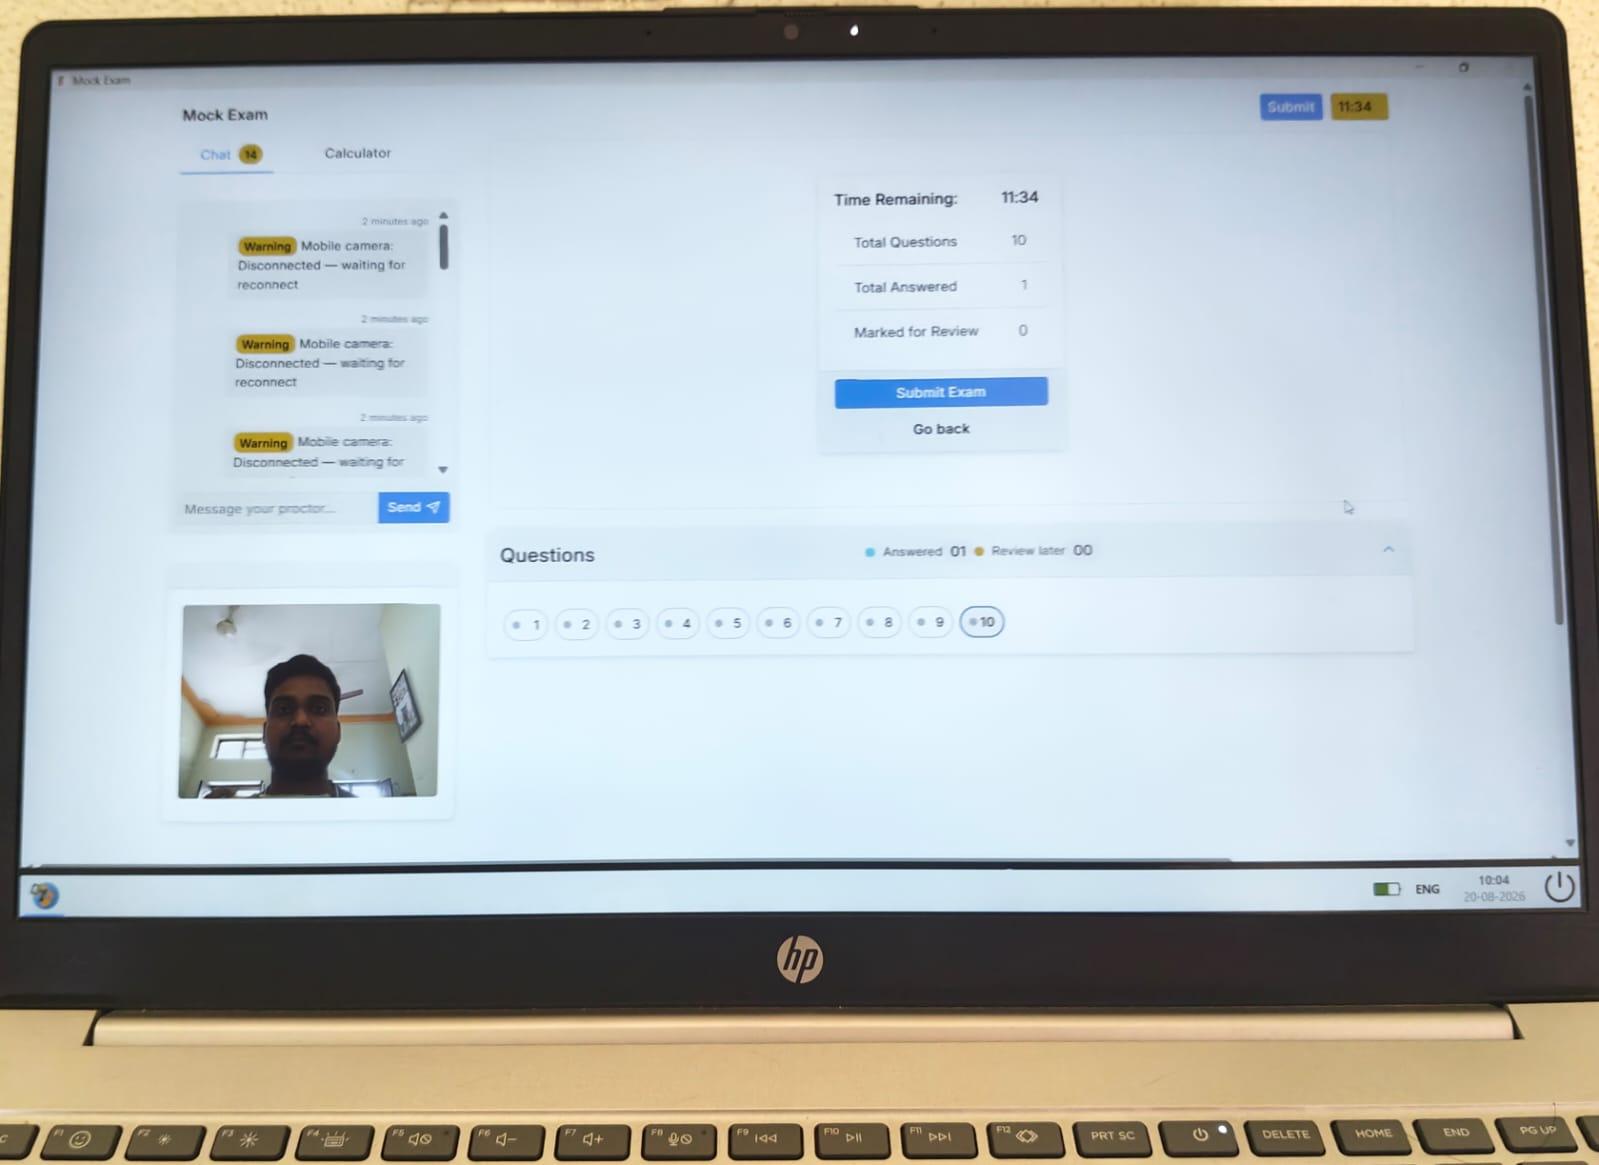
Read each question carefully and answer within the allotted time. Your screen shows the timer, question navigation, proctor messages, and mobile-camera status.
- Use Submit Exam when you finish, then follow the on-screen instructions
- If SEB asks for a quit password, don't try to enter one yourself — contact SkillDzire support instead
- Finish by clicking Exit Safe Exam Browser
Camera access denied — two fixes
If the exam page shows "Camera access denied. Please allow camera access," try these in order.
Fix 1 — Reset site permissions
- Tap the lock/info icon next to the address exams.skilldzire.com to open site permissions
- Tap Reset Permissions to clear the blocked "Not allowed" camera setting
- When the popup asks again, tap Allow — the camera turns on automatically, no reload needed

Fix 2 — Clear cached data in Chrome
- Open Chrome → Settings → Delete browsing data
- Set the range to Last 24 hours and select only "Cached images and files" — leave cookies unchecked
- Tap Delete data, then fully close and reopen Chrome
- Reopen the exam site, allow camera access, and tap Start Recording to confirm it works
